![]() CONTEXT / SCOPE
CONTEXT / SCOPE
The purpose of this SOP is to provide the CSM with clear instructions and steps to ensure full understanding of the Credentialing Software and its respective modules and submodules. Having this knowledge will improve how CSMs provide their training sessions, as well as be more prepared for questions the admins will have.
![]() IMPACTED TEAMS
IMPACTED TEAMS
Strategic CSMs
Core CSMs
![]() GLOSSARY
GLOSSARY
ASC - Ambulatory Surgery Center
Board Certification - The process by which a physician or other professional demonstrates a mastery of advanced knowledge and skills through written, oral, practical, or simulator-based testing.
CAQH - Council for Affordable Quality Healthcare
CAQH ProView - The CAQH Provider Data Portal is the healthcare industry's premier resource for reporting professional and practice information to health plans and other healthcare organizations.
CRED SOFT - Self-Managed Credentialing Software (Credentialing Software)
CSM – Customer Success Manager
DEA - Drug Enforcement Administration
EIN - Employer Identification Number.
Exclusions - The result of an extreme sanction which is issued by the HHS OIG (Office of Inspector General). Exclusions are typically reserved for those who pose a high risk to patients or a program’s integrity.
FQHC - Federally Qualified Health Center
NPDB - National Practitioner Data Bank
NPI - National Provider Identifier
NUCC- National Uniform Claim Committee
OIG - Office of Inspector General
Payor (aka “Payer”) - A person, organization, or entity that pays for the care services administered by a healthcare provider.
Provider - A person or entity that provides medical care or treatment.
SAM - System of Award Management
SF - Salesforce
TIN - Taxpayer Identification Number.
TL - Team Lead
Find what you’re looking for by training session number! |
![]() TABLE OF CONTENTS
TABLE OF CONTENTS
There is an Add Information button at the bottom of the page:
20240718-1829-56.6437106.mp4There is an Add Information button at the bottom of the page:
Make sure that you have uploaded the completed Locations, Departments and Positions rosters into the system (these will be requested since your first email using the Welcome to MedTrainer! CSM Template available in Outreach). After that,
Ensure to send the admin the downloaded Employee roster from their account’s Employee Center. (this will be required in the Onboarding Call Recap email template) Once that is completed by the admin, you will be able to upload their employee lists with less issues.
Please make sure to send the following rosters to the admin:
ONLY for Standard and Premium Accounts
![]()
Ideally, the admin’s accounts can be set with their employees before training sessions. If this is not possible before then, simply remind the admin it is important to do so in case they would like assistance with initial setup. Please follow the Initial Organization Management Setup, and feel free to forward this file to your admins in its PDF form 
Ideally, the admin’s accounts can be set with their employees before training sessions. If this is not possible before then, simply remind the admin it is important to do so in case they would like assistance with initial setup. Please follow the Initial Organization Management Setup, and feel free to forward this file to your admins in its PDF form as well. Remember to log in the “LMS Set-Up Completed Date” field in the Onboarding Object.
Remember to enter the “LMS Set-Up Completed Date” field in the Onboarding Object.
The purpose of this is to:
Ensure you are is familiar with the system, performing all the possible tasks in each module.
Showing the admin how the system looks real time, with populated data.
Leaving the admin’s account as a clean slate to use from scratch.
Make sure to have:
Providers and Practices Locations with Credentialing Enabled
Uploaded test documents for at least one provider
Enrollments, Verifications, Mandatory and Location Documents in at least one Practice Location.
In order to provide more detail of several fields within the modules and their respective pages, you can advise the admin to hover over the following icon:
In order to provide more detail of several fields within the modules and their respective pages, you can advise the admin to hover over the following icon:
If your admin would like you to schedule the meeting on a specific date and time, review Options 1, 2 and 3 sections of the Onboarding SOP. -
If the admin hasn’t scheduled a training session yet, please send proposed times as shown in the Option 4: Gmail (Inserting Proposed Times) section of the Onboarding SOP.
For all the above, please make sure to select the correct meeting type when scheduling. You can find them in the Training Meeting Types Outreach Collection. Remember that we have the following:  Please note that the meeting descriptions will contain the schedule per training session, as stated in the Training Matrix (found in the https://medtrainer.atlassian.net/wiki/pages/resumedraft.action?draftId=4221435905&draftShareId=7263dcfd-160f-46aa-bf09-123b3825a5ef) |
We need to have the training sessions logged into the corresponding SF account, and confirm that the meeting also appears scheduled in Gong so that it can be recorded. You can check in Gong if your meeting appears once you click on the “View upcoming calls” section. It should appear if the process was followed. If this is not the case, please perform the following steps:
SchedMeetingGONG.mp4Please follow the https://medtrainer.atlassian.net/wiki/pages/resumedraft.action?draftId=4159504610&draftShareId=12f6a5fa-018f-4afb-8a48-51ae87f171a8 SOP to keep track of your emails, calls and meetings, both for visibility and account management purposes.
Please follow the https://medtrainer.atlassian.net/wiki/pages/resumedraft.action?draftId=4159504610&draftShareId=12f6a5fa-018f-4afb-8a48-51ae87f171a8 SOP to keep track of your emails, calls and meetings, both for visibility and account management purposes.
Training Session 1 |
If this is the first training session with your admin, provide Organization Management training covering the following topics (it is suggested to follow the steps on the Initial Organization Management Setup , as it follows the recommended setup order. Feel free to forward this file to your admins as well):
Locations
How to create and modify them
How to designate a location manager

Departments
How to create and modify them
Department Visibility

Positions
Both position databases (extended and generic)
How to create and modify them

Employee Center
Creating new users
Changing employee status
6 options under each user dropdown

Full profile walkthrough

Settings:

Organization Reports:

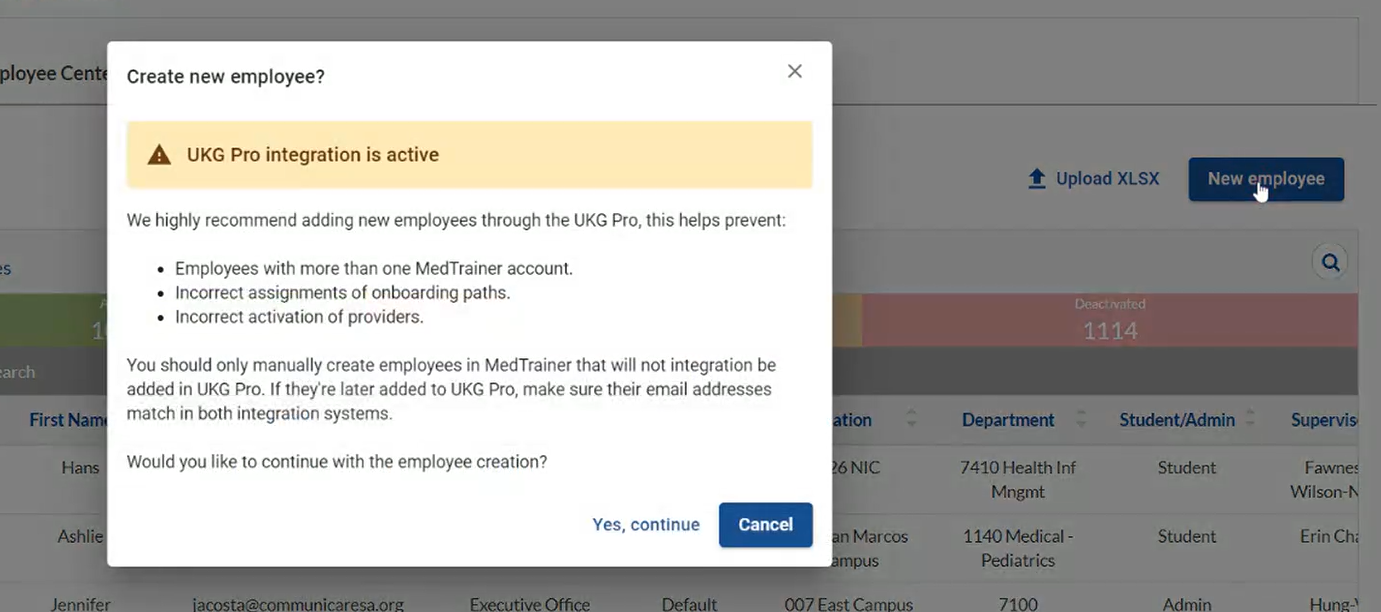
For accounts that purchased an integration: When the admins try to create employees manually from the employee center, they will see the warning message that remarks the risk of duplicated accounts or incorrect assignments. We want to encourage them to add the new employees only by the integration and to understand the possible consequences of doing manual creation. please refer to the MT-CS-018: SSO Services and HRIS Integrations SOP for more information.
Remember to let the admin know that NPI and SSN fields are now available in the full profiles.
Remember to let the admin know that NPI and SSN fields are now available in the full profiles.
Before creating any employees it is best practice to have the account foundation ready to make the rest of the organizational management process more efficient.
The first step is to create the practice locations. As a recommendation, if the needed locations are less than 10, it is faster to individually create them. If there are several locations, it is faster to download our CSV template, populate the information, and then upload the file so they can be created in bulk.
20240716-2208-45.1319897.mp420240716-2211-22.0331558.mp4Credentialing Information. This is where the admin will be able to set up their practice location details.

Please give the admin a walkthrough of the tabs:
Populating the modules of the Information tab will be helpful not only for better organization, but for a more complete location profile at the time of starting enrollments with payors:
20240716-2223-33.6636119.mp4Payors/Insurances that pertain to each practice location can be set here:
20240716-2224-45.4830513.mp4Once providers start getting enabled in each location, and get their provider profiles active, they will start showing below as such:
20240716-2227-23.7348783.mp4Set verifications for any applicable documents, such as the DEA License Verification.
20240716-2229-15.3163770.mp4“Document needs vary based on the type of provider and insurance plan. Here are a list of base documents that may be needed:
Practitioner License(s)
Malpractice Insurance (Certificate of Insurance)
DEA (federal) and state CDS certificates
Board Certification(s)
Diploma – copy of highest level of education (required for non-MD’s,DO’s)
Current CV (showing current employer, and all entries have mm/yy format)
IRS Form W-9
Current driver’s license
Other documents that may be applicable:
ECFMG Certificate (if educated outside of The United States)
Passport or other citizenship documents (if born outside U.S. and not previously enrolled in Medicare)
Collaborative Agreement (required for Nurse Practitioners)
Admitting Arrangement letter (required for providers who do not have hospital admitting privileges)
Prescribing arrangement letter for providers not holding DEA certificate”
To learn more about documents providers need for credentialing, visit https://physicianpracticespecialists.com/credentialing/types-of-documentation-needed-for-physician-credentialing/.
Here, admins can set a list of documents that will be requested from providers:
20240716-2230-57.0084795.mp4“Documents needed for your legal entity:
IRS form CP575 or replacement letter 147C (verification of EIN)
CLIA Certificate
Business License
Copy of office lease (required for therapy facilities)
Letter of bank account verification (for Medicare enrollment)”
To learn more about documents providers need for credentialing, visit https://physicianpracticespecialists.com/credentialing/types-of-documentation-needed-for-physician-credentialing/.
All practice location documents can be set here:
20240716-2233-33.0604289.mp4Make sure to guide your admin through these action buttons:
20240716-2236-30.9702245.mp4Make sure to guide your admin through these action buttons:
OPTIONAL STEP FOR ADMINS: To set up Location Managers in advance (or if they haven’t been set up previously), go back to Organization Management - Locations, find the location you need, and click on this button: Here, you can add any of your Admins and Super Admins as Location Managers:  You can also enable manager notifications   Or delete admins  |
“A National Provider Identifier (NPI) is a 10-digit numerical unique identifier and a Health Insurance Portability and Accountability Act (HIPAA) standard. NPI replaced the numerous different provider numbers previously issued by each payer with a single identifier that is used across all health plans.
There are 2 different types of NPIs; Type 1 (individual) and Type 2 (organizational). All clinical providers need to obtain a type 1 (individual) NPI number. This number will identify the provider who rendered services to a patient and needs to be reported on claim forms sent to payers.
Group practices that bill with a group tax identification number (TIN) should also apply for a Type 2, organizational NPI. This Type 2 NPI number should be used to complete enrollments with payers and for billing purposes. For group practices, individual providers' NPIs will be linked to the group NPI in the payer's system and both reported on claim forms submitted for reimbursement.”
To learn more about NPIs and TINs, visit https://support.drchrono.com/hc/en-us/articles/7117152502427-Individual-vs-Organizational-NPIs
There are two types of NPIs: Type 1, for individual health care providers, such as dentists and hygienists, and Type 2 for incorporated businesses, such as group practices and clinics. In this submodule, the admin will be able to add their organizational NPIs (Type 2) and link them to the corresponding practice locations.
20240716-2245-08.8546348.mp4Guide the admin through the process of setting up their necessary departments and positions.
20240716-2249-27.9015583.mp4Departments can be made invisible from admins by toggling the blue switch on the right of each one.
Departments can be made invisible from admins by toggling the blue switch on the right of each one.
Remember that we have two databases: the initial 10-page database , and a hidden generic database after clicking on the “Create Position” button. Once the pop-up window shows, there are 3 options:
Searching through the Generic Database, selecting and hitting “Create”
If they need something more specific (if there are any internal ways of classifying positions), they can click on “Create New” and type in the position.
If they have a similar case as #2, but they need to do a massive position upload, they can click on Upload CSV and upload the filled-in spreadsheet.
If the organization has divisions, these can be added here:
20240716-2256-21.5516529.mp4For some historical fun facts on how medical departments and divisions came to be, visit https://www.amjmed.com/article/S0002-9343(05)01145-9/fulltext |
In the Provider Profiles dashboard, the admin will be able to enable and disable provider profiles, as well as see any terminated provider profiles. Ideally, you should already have at least one active provider profile, which will be used for the walkthrough.
If no providers have been activated previously, go to the “Not Enabled” tab, look for your provider, and click on “Activate”. Once you do, they will let you choose their main practice location. Then you can “Save” or “Save and go to profile”. 20240717-1440-32.7004149.mp4Providers can also be disabled at any time:  |
It is recommended to start the provider profile walkthrough from right to left (excluding Privilege Delineation), as it follows the same flow of the hiring-onboarding-credentialing process.
It is recommended to start the provider profile walkthrough from right to left (excluding Privilege Delineation), as it follows the same flow of the hiring-onboarding-credentialing process.
Admins can add or remove locations as applicable. If the provider has one main practice location, the system will recognize it as such by having it dragged to the top of the list.
20240717-1451-51.5577520.mp4Admins can also pull practice location reports per provider:
20240717-1454-33.5004820.mp4This tab will help the admins monitor provider documents individually. Please provide the steps on:
Filtering the document list view
Uploading a new document
Reviewing the action buttons
Sending requests
Reviewing reminders
Exporting reports
Document Type Catalog Update: Effective immediately:
What does this mean for you and our clients?
Why the change?
|
“An exclusion is a provision within an insurance policy that eliminates coverage for certain acts, property, types of damage or locations. Things that are excluded are not covered by the plan, and excluded costs don’t count towards the plan’s total out-of-pocket maximum.“
To learn more, visit https://www.healthinsurance.org/glossary/exclusion/
The exclusions tab runs these automatically, so if there are any exclusions involving the provider, they will pop up here:
20240717-1844-13.2480320.mp4If exclusions are not previously set for all staff, this is the way to do it, located in the Exclusions Module section. |
This is where all provider background history is added. Think of this as a very detailed resume. Guide the admins through all the categories, and remember to mention:
The progress bar will adjust to the amount of information completed.
All fields highlighted in red are mandatory
Billing type is pre-set and should remain as is, for this is configured according to initial account set-up found in the MT-CS-001: Account Creation and CSM AssignmentSOP
A lot of our clients use a platform called CAQH, where they have similar information fields filled in for their providers. In order to migrate the information into our platform, they will need the following:

Once these requirements are completed, the button will become enabled.
To learn more about CAQH and how it is involved in the MedTrainer credentialing process, visit:
“Provider enrollment is the process of registering with an insurance network to become an approved provider and receive reimbursement for services provided to patients covered by that network. It involves submitting an application and supporting documentation, such as proof of licensure, malpractice insurance, and education and training credentials.“
To learn more about enrollments, and how they are different from provider credentialing, please visit https://physicianpracticespecialists.com/credentialing/provider-credentialing-vs-provider-enrollment-understanding-the-difference/
This tab is designed to be complex, as there are many factors to consider during the Enrollment process.
To add an enrollment, make sure that you have Insurances according to the https://medtrainer.atlassian.net/wiki/spaces/CSKB/pages/edit-v2/4135583745?draftShareId=22b6aaca-4c27-43de-ac1a-24b7bc456890#Practice-Locations process.
To add an enrollment, make sure that you have Insurances according to the https://medtrainer.atlassian.net/wiki/spaces/CSKB/pages/edit-v2/4135583745?draftShareId=22b6aaca-4c27-43de-ac1a-24b7bc456890#Practice-Locations process.
Walk the admin through the following steps:
20240717-1945-26.1670605.mp420240717-1947-52.4868911.mp4The enrollments that appear are the ones previously set in the https://medtrainer.atlassian.net/wiki/spaces/CSKB/pages/edit-v2/4135583745?draftShareId=22b6aaca-4c27-43de-ac1a-24b7bc456890#Set-Up-Insurances section.
The enrollments that appear are the ones previously set in the https://medtrainer.atlassian.net/wiki/spaces/CSKB/pages/edit-v2/4135583745?draftShareId=22b6aaca-4c27-43de-ac1a-24b7bc456890#Set-Up-Insurances section.
When viewing the Enrollment Details, you will have these tabs available:
Information - Main enrollment details, and additional information about the enrollment workflow, the provider, and the lines of business. There are also important timeline and date fields at the bottom.
“Line of business, in the realm of commercial insurance, refers to a specific category or type of insurance coverage that is offered to businesses or individuals within a particular industry or sector. It represents a distinct area of insurance that is tailored to address the unique risks and needs associated with a specific line of work or business activity.“
To learn more, visit https://foundershield.com/insurance-terms/definition/line-of-business/
Process Checklist - The enrollment process to-do list. These lists can be set by provider or group enrollments.
Notes - Important mentions and updates about the enrollment process.
Tasks - Here is where items from the process checklist can be assigned to individuals
Amend Form - Here is where admins can fill in provider initial application forms for any payers they have selected. Each payer has its own fillable form.
If there is a form missing for any payer, or the current form is not working, please reach out to Customer Support via the #mt-functional-questions ![]() Slack channel.
Slack channel.
If there is a form missing for any payer, or the current form is not working, please reach out to Customer Support via the #mt-functional-questions ![]() Slack channel.
Slack channel.
Enrollment Documents - Any documents relevant to the provider’s/group’s enrollment process
Contacts - Any applicable contact points discovered or needed throughout the enrollment process
Fax - If any fax messages are received, they will appear here.
Activity Logs - All in-system actions taken or changes made throughout the enrollment process will reflect here.
If any tasks are due, they will appear as shown below. Remember that admins can also run enrollment tasks reports:
20240718-1811-31.3425683.mp4If any tasks are due, they will appear as shown below. Remember that admins can also run enrollment tasks reports:
Lastly, the Dashboard tab provides us with a status summary on: Documents, Verifications, Enrollments and Enrollment Tasks. The graphs shown are also hyperlinked to each of their respective sections of the provider profile, for quick access.
20240718-1813-01.1051965.mp4Training Session 2 |
This dashboard provides an overview on all credentialing stats (including Notifications and Tasks) and has two main action buttons: “+New Enrollments” and “Activate Providers”.
Please give the admin a full overview of what shows below:
Notifications
Tasks (new tasks can be created here)
Documents (hyperlinked)
Enrollment Status (hyperlinked)
Verifications
Licenses
Admins can active providers directly from their dashboard, they will be redirected to the provider profiles dashboard.
20240718-1924-01.6079629.mp4Please keep in mind that the admins will be able to access the rest of the submodules directly from the Admin Dashboard, as they are linked.
Please keep in mind that the admins will be able to access the rest of the submodules directly from the Admin Dashboard, as they are linked.
In the Provider Profiles dashboard, the admin can:
Disable active provider profiles
Enable provider profiles
View any terminated provider profiles
Pull reports per active provider and all active providers
“Hospital privileges give doctors authorization to practice at and admit patients to a particular hospital. These privileges allow physicians to perform specific procedures like surgery and must be awarded by every hospital where a doctor wants to practice in.
Types of hospital privileges
There are three main categories of hospital privileges:
Admitting privilege authorizes a physician to admit patients to a particular hospital without the need for the patient to go through the ER first. Physicians with admitting privileges are able to treat their patients within the hospital and work alongside hospital staff when need be.
Courtesy privilege authorizes a physician to admit, but not necessarily treat, patients at a specific hospital. Generally, courtesy privileges are used by physicians to visit admitted patients regarding their medical care.
Surgical privilege authorizes physicians to perform outpatient surgeries and to book the hospital or surgery center’s operating room.”
Hospital privileges and hospital credentialing sound similar, but they are indeed two different processes. Hospital credentialing must happen before you apply for hospital privileges.
During this credentialing process, the medical facility will focus on ensuring that you are able to provide competent and safe patient care. To do so, hospital bylaws will be consulted and you will be required to provide proof of your education and medical training. “
To learn more about privilege appointments and reappointments, visit https://support.drchrono.com/hc/en-us/articles/7117152502427-Individual-vs-Organizational-NPIs
This dashboard shows an overview of all the existing privileges and appointments applicable to the providers. Admins and Super Admins will be able to generate new appointments here as well.
20240718-1941-21.6818874.mp4Delineation of Privileges (DOP) Form Builder:
These updates significantly enhance the flexibility, usability, and efficiency of the form-building experience, ensuring our tool supports a broader range of DOP forms.
Previously, our DOP Form Builder lacked essential features that made it impractical for many real-world use cases. Users had to work around several limitations, such as:
Limited control over privilege clusters.
Inability to add custom labels for signatures.
Form headers appearing on every page of generated PDFs.
No way to indicate privileges that were "Not Requested."
These gaps meant that many users still relied on external tools to complete their forms.
What does this update mean for our clients?
These enhancements will:
Improve data clarity by refining privilege clusters and privilege status tracking.
Reduce manual work by allowing admins to define custom titles for signature fields.
Enhance document readability by improving PDF formatting.
Ensure greater flexibility in form creation by expanding text fields and supporting multiple signatures.
Here’s What’s New:
Forms Catalog Module Enhancements
Form Name → Form Title: Standardized terminology across the platform.
PDF Header Update: Now only visible on the first page of generated PDFs.
Privilege Clusters Enhancements
New Description Field: Admins can add up to 5000 characters before each privilege cluster.
Updated Status Selection: "Not Requested" has been added as an option. Round buttons now group mutually exclusive selections (e.g., selecting "Granted" clears "Denied").
Improved Table Layout: Titles appear above tables, and the Privilege column is clearer.

Signatures Section Enhancements
Customizable Signature Titles: Admins can rename “Applicant Signature” and “Approval Signature” (e.g., "Committee Head of XXX").
Multiple Approval Signatures: Users can now add, delete (“X”), and reorder multiple approval signatures.
New Description Fields: Up to 5000 characters for Applicant, Approval, and Additional Signatures (useful for disclaimers/instructions).

PDF Output Enhancements
New "Not Requested" Column in Privilege Clusters.
Improved Round Button Formatting for Requested, Not Requested, Granted, and Denied statuses.
Signature Formatting: Custom titles and descriptions now appear in PDFs.
Delineation of Privileges (DOP) Form Builder:
These updates significantly enhance the flexibility, usability, and efficiency of the form-building experience, ensuring our tool supports a broader range of DOP forms.
Previously, our DOP Form Builder lacked essential features that made it impractical for many real-world use cases. Users had to work around several limitations, such as:
Limited control over privilege clusters.
Inability to add custom labels for signatures.
Form headers appearing on every page of generated PDFs.
No way to indicate privileges that were "Not Requested."
These gaps meant that many users still relied on external tools to complete their forms.
What does this update mean for our clients?
These enhancements will:
Improve data clarity by refining privilege clusters and privilege status tracking.
Reduce manual work by allowing admins to define custom titles for signature fields.
Enhance document readability by improving PDF formatting.
Ensure greater flexibility in form creation by expanding text fields and supporting multiple signatures.
Here’s What’s New:
Forms Catalog Module Enhancements
Form Name → Form Title: Standardized terminology across the platform.
PDF Header Update: Now only visible on the first page of generated PDFs.
Privilege Clusters Enhancements
New Description Field: Admins can add up to 5000 characters before each privilege cluster.
Updated Status Selection: "Not Requested" has been added as an option. Round buttons now group mutually exclusive selections (e.g., selecting "Granted" clears "Denied").
Improved Table Layout: Titles appear above tables, and the Privilege column is clearer.
Signatures Section Enhancements
Customizable Signature Titles: Admins can rename “Applicant Signature” and “Approval Signature” (e.g., "Committee Head of XXX").
Multiple Approval Signatures: Users can now add, delete (“X”), and reorder multiple approval signatures.
New Description Fields: Up to 5000 characters for Applicant, Approval, and Additional Signatures (useful for disclaimers/instructions).
PDF Output Enhancements
New "Not Requested" Column in Privilege Clusters.
Improved Round Button Formatting for Requested, Not Requested, Granted, and Denied statuses.
Signature Formatting: Custom titles and descriptions now appear in PDFs.
This module shows an overview of all document stages, and will also let the admin upload any missing documents, or update any expired ones:
By selecting each document, they can both upload a new document version, or go to the provider’s profile.
By selecting each document, they can both upload a new document version, or go to the provider’s profile.
The custom document type facility introduces a dedicated section for managing custom document types. Admins now have full control over the lifecycle of custom document types, from creation to deprecation. The streamlined process eliminates confusion, improves usability, and ensures accurate data management. What is new?
|
Document Containers help admins organize documents further, by helping them categorize even more. This enhancement is designed to simplify and accelerate document management, addressing one of the most requested improvements from our clients.
Massive update option: A new action is available in the Documents module (mt|credentialing / Documents), allowing users to select multiple document containers and initiate a massive update.
Massive editing capabilities: Users can update fields such as: Alias, state, Expiration Date (with a "Does not expire" option) and Archived.
Enhanced user interaction: A confirmation screen is provided to review and verify changes before applying them.
Activity Logging: All changes made during massive updates are recorded for traceability.
Improved selection tools: Select all visible items or the entire dataset, even across multiple pages, for massive updates.
massive update.webmUpdates:
Renamed "Expiration Date" Column:
The "Expiration Date" column in the document table has been renamed to "Expiration" to reduce redundancy.
Simplified "Version" Column Display:
The "Version" column now displays only numeric values (e.g., "1," "2") instead of the full label (e.g., "Version 1," "Version 2").
Reordered Columns:
The "State" column has been repositioned to appear immediately after the "Archived" column for improved user navigation.

This enhancement simplifies field population by introducing auto filling capabilities that leverage provider data within the system. Users can now automate the autofill process, and ensure accurate data integration for every submission. This reduces time spent on manual tasks and minimizes errors, enabling a more efficient workflow.
With these updates, users can now autofill any document (that meet all requirements) to meet their diverse credentialing requirements, such as onboarding new providers, submitting reappointment applications, or completing enrollment packages. Whether managing a single provider or multiple, this streamlined process ensures higher accuracy, consistency, and compliance while saving valuable time.
What it consists of:
Mapping field names
For this scope we are only supporting fields from provider information section.
Details about the field names for mapping and how to configure can be found in the User Guide.
Autofill for Form Fill Documents
One-click action to populate form-fill PDFs with mapped provider data.
Seamless integration ensures new data replaces existing data on the most current document version—no new version is created.
Activity Logs
Logs are generated only if data is updated during the autofill process.
Users can view these logs to verify that autofill actions were recorded accurately.
Our platform makes sure that manually entered data in PDF forms is retained, providing a more seamless and reliable experience for users.
Previously, when users manually entered data into PDF forms, the information was not retained if the page was refreshed or navigated away from. This meant that any manual changes were lost, requiring users to re-enter the data. Additionally, when combining the autofill feature with manual input, only the autofilled data was saved, while manually entered information was discarded. This created inefficiencies and frustration, especially in workflows requiring both autofill and manual data entry.
Here are the features:
"Save" Button for Manual Changes:
A "Save" button is available for editable PDF forms, allowing users to save manually entered data.
The button is only visible for PDF files with fillable fields.
Unsaved Changes Alerts:
Users will see a persistent alert when they manually enter data into a PDF form, reminding them to save their changes before leaving the page.
Unsaved Changes Modal:
If a user attempts to navigate away from the PDF viewer with unsaved changes, a modal will appear, offering options to save changes, or stay on the page.
Integration of Autofill and Manual Input:
The system retains both autofilled and manually entered data, allowing users to combine both methods without losing any information.
Activity Logs for Manual Saves:
Every time a user saves manually entered data, the system logs the action.
Exclusion of Signature Fields:
Fields marked as "signature type" are excluded from being saved automatically, ensuring the integrity of signed documents.
Previously, creating a credentialing packet was a manual and time-consuming process conducted outside MT. Users had to copy and paste all necessary documents into Adobe PDF to combine them into a single file.
This feature empowers Admins and Super Admins to seamlessly create credentialing packets for each provider directly within the system, eliminating the need for manual document assembly.
This enhancement enables Admins and Super Admins to create, manage, and optimize credentialing packet templates effortlessly.
Capabilities in Credentialing Packet Settings
Within this feature, users can:
Create New Templates: Set up credentialing packet templates by specifying the required document containers.
Edit Existing Templates: Update or modify templates to reflect new requirements.
Deprecate Templates: Retire templates that are no longer needed.
Delete Templates: Permanently remove unnecessary templates.
Using Credentialing Packet Templates in the Provider Profile/ Documents tab
A new option, Generate New Packet Version, is now available for credentialing packet containers. This feature allows users to:
Select an active template from the Credentialing Packet Settings.
Match the template’s document containers with the available document containers for a specific provider.
Choose which documents from the list should be included in the new version of the credentialing packet.
Automatically merge all selected documents into a single version, accessible within the Credentialing Packet container.
This module allows the user to submit documents into provider profile in one place, making the provider documents upload/update process more streamlined. It has a similar functionality to the In-App reports. Please go over it with the admin.
Document Container Selector: Characteristics:
|
Upload Link: Previously, providers could not upload their own files. All submissions were manually collected and uploaded by admin or super admin users, creating extra work. This update introduces a self-service file upload option for providers and employees, reducing manual tasks for admins and making submissions faster. Here is what's new:
|
The Logs button will take the user to the Logs Report in the Credentialing In-App Reports.
The Logs button will take the user to the Logs Report in the Credentialing In-App Reports.
We support the following file types:

We support the following file types:

Here, the admin will be able to filter and visualize all enrollment applications initiated, as well as: view details, delete or view activity logs.
The View button leads to the Information section of the Enrollments tab of the corresponding provider profile.
The New Enrollments button leads to creating any missing enrollment application records for providers
For insurances to appear here, they have to previously be set up as noted in the https://medtrainer.atlassian.net/wiki/spaces/CSKB/pages/edit-v2/4221469078#Set-Up-Insurances section
For insurances to appear here, they have to previously be set up as noted in the https://medtrainer.atlassian.net/wiki/spaces/CSKB/pages/edit-v2/4221469078#Set-Up-Insurances section
Feel free to share the https://drive.google.com/file/d/1mdD4J8HyY1DyCs-GWQo5xCywWYWYcUzv/view?usp=sharing with your admins. |
This dashboard provides a summary on the following regarding enrollment applications:
Open and Closed Enrollment Applications
Top 5 Most Open and Closed Enrollment Applications
Open and Closed Applications Age
Top 5 Oldest and Slowest Cases
The goal is to give the admin full visibility of what is happening, as well as notice trends and outliers.
20240718-2000-25.4340579.mp4An 'Enrollments productivity' entry has been added to the 'Credentialing dashboards' catalog.
When accessing the new dashboard, an 'Enrollments turnaround time' section, with the following widgets included will be displayed:
Completed Applications Total Turnaround Time (TTT)
Open Applications Total Turnaround Age (TTA)
Submitted Applications Time to Submission (TTS)
Unsubmitted Applications Time to Submission Age (TTSA)
Payer Turnaround Time (PTAT)
Open Applications Payer Turnaround Age (PTAA)
The 'About widget' functionality has been revamped to provide more detailed and useful information about the widget calculation to the user.
Each widget has its own description available.
The filtering options has been enhanced.
An 'Enrollments productivity' entry has been added to the 'Credentialing dashboards' catalog.
When accessing the new dashboard, an 'Enrollments turnaround time' section, with the following widgets included will be displayed:
Completed Applications Total Turnaround Time (TTT)
Open Applications Total Turnaround Age (TTA)
Submitted Applications Time to Submission (TTS)
Unsubmitted Applications Time to Submission Age (TTSA)
Payer Turnaround Time (PTAT)
Open Applications Payer Turnaround Age (PTAA)
The 'About widget' functionality has been revamped to provide more detailed and useful information about the widget calculation to the user.
Each widget has its own description available.
The filtering options has been enhanced.
Two new widgets: ‘Follow-up Dates’ and ‘Document Status’.
Updates:
Reminder: Please log out and log back in to see the changes. Screenshare - 2025-02-19 4_55_10 PM.mp4 |
This module simply summarizes the list of Insurances linked to the account’s Practice Locations:
20240718-2002-40.2322554.mp4“In simplest terms, a business entity is an organization created by an individual or individuals to conduct business, engage in a trade or partake in similar activities. There are various types of business entities — sole proprietorship, partnership, LLC, corporation, etc. — and a business's entity type dictates both the structure of that organization and how that company is taxed.“
To learn more, visit https://www.nerdwallet.com/article/small-business/business-entity
This dashboard will let admins and super admins manage and create new business entities:
20240718-2008-14.5781520.mp4Though we mentioned this module in part 1, admins are able to do much more:
Viewing location details here
Filtering locations (by credentialing enabled/not enabled, and more)
Create new locations
Multiple setup:
Adding multiple verifications
Adding multiple documents
Enabling insurances in multiple locations
These is the available reports we have:

These is the available reports we have:

We currently have this color formatting feature:
20240805-1857-03.1688186.mp4We currently have this color formatting feature:
Pivot Table Functionality: a new functionality that provides users with the ability to explore the data for specific use cases in a summarized way. This is done by adding pivot columns and values. Guide the admin through an overview of what these look like, and how data is arranged.

|
A couple of these reports are still active in several accounts, but remember that the main goal is to get our admins to migrate into the In-App reports fully.
20240814-1951-43.9477101.mp4Simple changes like enabling email notifications, changing the company name and address, and updating the super admin’s password.
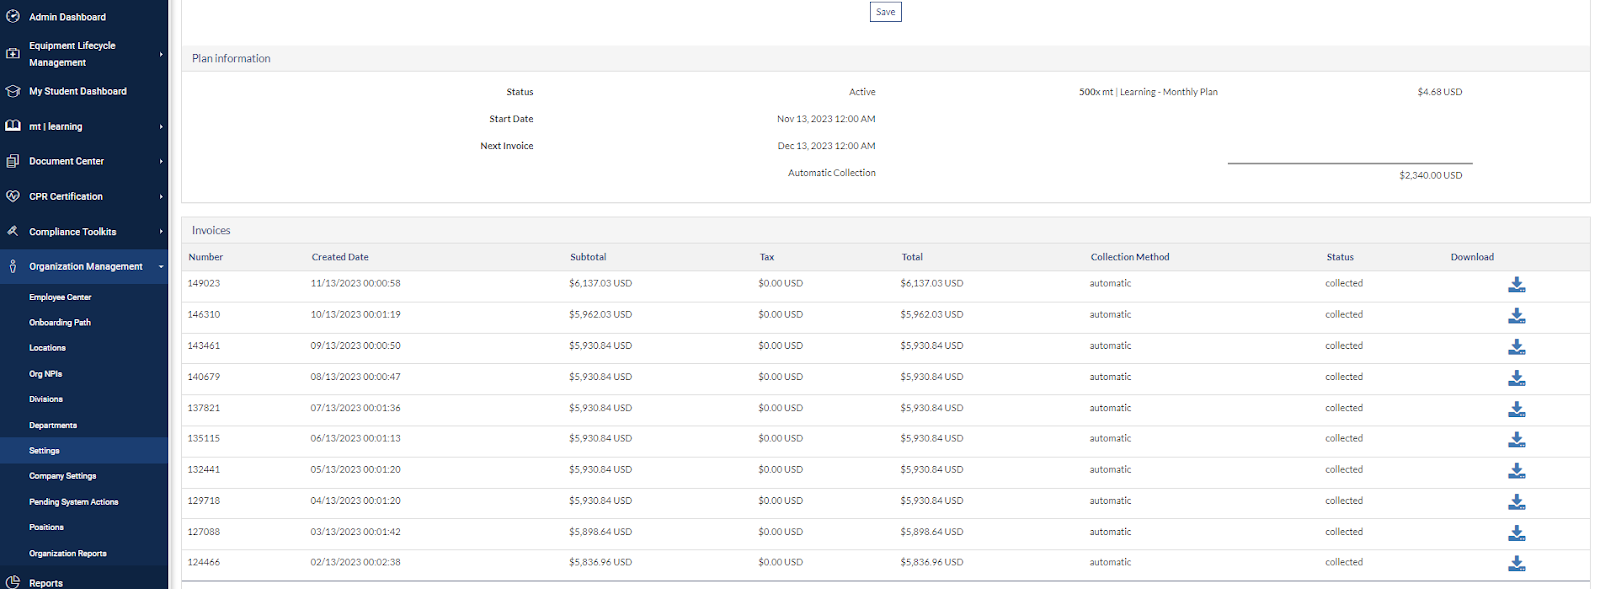
20240814-1953-47.0414072.mp4Only super admins will be able to see billing information at the bottom of the screen. |
These help our admins tailor out how they want their LMS accounts to work. Remember to go into module-specific settings here:
Under General Settings:
Provider number
Under Reminders:
Enable Provider Notifications (Credentialing)
The Credentialing Tab
This module basically provides quick detailed access to detailed exclusion-related information. The submodules are the following:
Any matches found for providers can be seen here:

If the admins want to run exclusion checks for all staff (not providers only), they will be able to configure that here. They will also be able to set exclusions per credentialing (practice) locations:
20240718-2025-07.0828167.mp4Admins will be able to configure specific exclusions per provider here:
20240718-2026-17.6939695.mp4This submodule will simply help configure enrollment notifications:

We will be retracing the steps on Credentialing (In-App) Reports section.
These is the available report we have here, but the admin is free to customize it:

These is the available report we have here, but the admin is free to customize it:

Once the training session has been completed, send a email using the Outreach Training Recap Outreach Email Template immediately after the training session recording has been processed (or at least before the end of day), and fill in necessary information such as:
Participants
Modules
Pending Subjects
Relevant Links
It is paramount to not only encourage, but reinforce the admin on the use of our Customer Support Department. Provide the contact information below:
Email: support@medtrainer.com
Phone number: 844.596.6553
The Support Module in the MedTrainer platform.
If the account acquired the Learning and/or the Credentialing Software Modules, please refer to any of the following SOPs:
Lastly, please refer to the https://medtrainer.atlassian.net/wiki/pages/resumedraft.action?draftId=4135616513&draftShareId=a3711c8d-3de8-4bf5-95fb-6db42e50e83c, in order to continue with the account adoption following the instructed guidelines.

